
As we all know, an artist wears many hats. Artist, marketer, business manager, public relations manager, and some (including me) photographer. It would be wonderful to be able to pay someone to take over some of these jobs. However, as an emerging artist, I do not yet have that luxury. I plan on spending most of my day photographing artwork so I can finish up the website that I've been working on. I have included photos of my photography set up. Of course, I have made it as inexpensive as possible. I'll start from the back of the set up and work forward. I have a home-made photo paper roll holder attached to the wall that was made from 2" x 8" scrap wood left over from a previous household project. Holes were drilled into the side supports to accommodate a left over piece of conduit, again from a previous household project, that now supports the paper roll.

The lights used are Smith-Vector. The bulbs are blue tinted daylight adjusted tungsten made by Eiko. 500 watt, 4800 kelvin, 110v-120v. They cost about $7.00 each. The lights are set at the same height and aimed at about 45 degree angles on each side. The use of a third light attached to a boom would be better. It would be located directly above the object being photographed and would help to reduce shadows. Here's the overall set up:


Make sure to set the white balance on the camera by putting a piece of white paper under the lights and finding the white balance manual setting on your camera. Fill the frame with just the white paper before doing so:

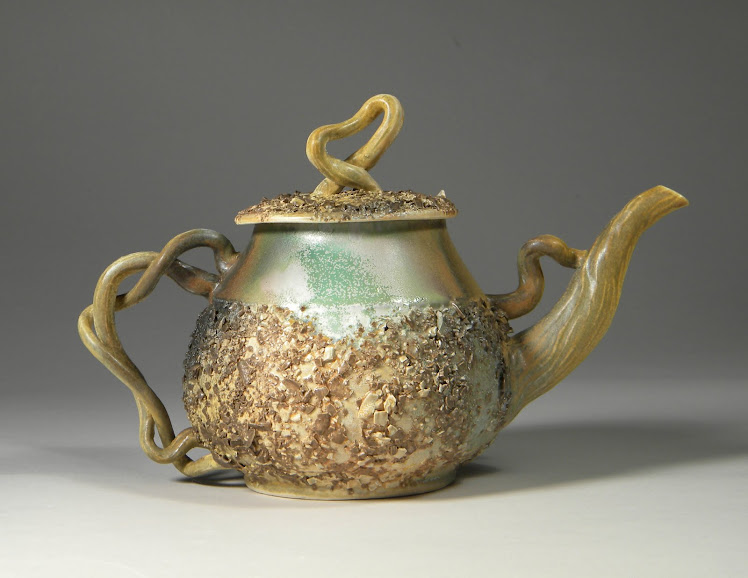
And here's the photographed piece. However, I believe that I will be pulling the table out a little to adjust the background shadow and adjust the lights a little lower to reduce the side shadows. Also, make sure that the room is dark when photographing by blocking out any windows and turning off lights other than those used to light your piece. It's a good idea to download that first photo before proceeding to do more pieces. It's much easier to see what adjustments need to be made on a large screen rather than the small screen on the back of the camera.

After adjusting the photo paper and lighting. Notice the reduction of side shadows from dropping the lights a little and also notice the more gradual appearance of the background shadowed area from pulling the table further from the wall and rounding out the transition from the flattened area of the paper on the table to where it attaches to the wall.

No comments:
Post a Comment